This sponge cake recipe was the cake I baked for my dad on Father’s Day. After just one bite, I knew it had earned a permanent spot in my recipe collection.
It takes everything I love about an old school cake and gives it a cosy little twist with a thick layer of vanilla butter icing, a drizzle of melted Biscoff and a scattering of white chocolate.
Picture a soft, fluffy vanilla sponge topped with sweet icing that melts on your tongue. It smells like a bakery on a Sunday morning and tastes like the sort of cake that appears in the middle of the table before everyone casually cuts themselves “just a small slice” and somehow comes back for three more.
It tastes like the kind of pudding you’d look forward to all week, especially with a thick layer of warm custard pooling around the edges.
If you love nostalgic bakes with a little extra indulgence, this Biscoff and White Chocolate sponge cake recipe is about to become a favourite.
Why You Will Love This Biscoff & White Chocolate Sponge Cake Recipe
This cake feels like a warm jumper straight from the radiator.
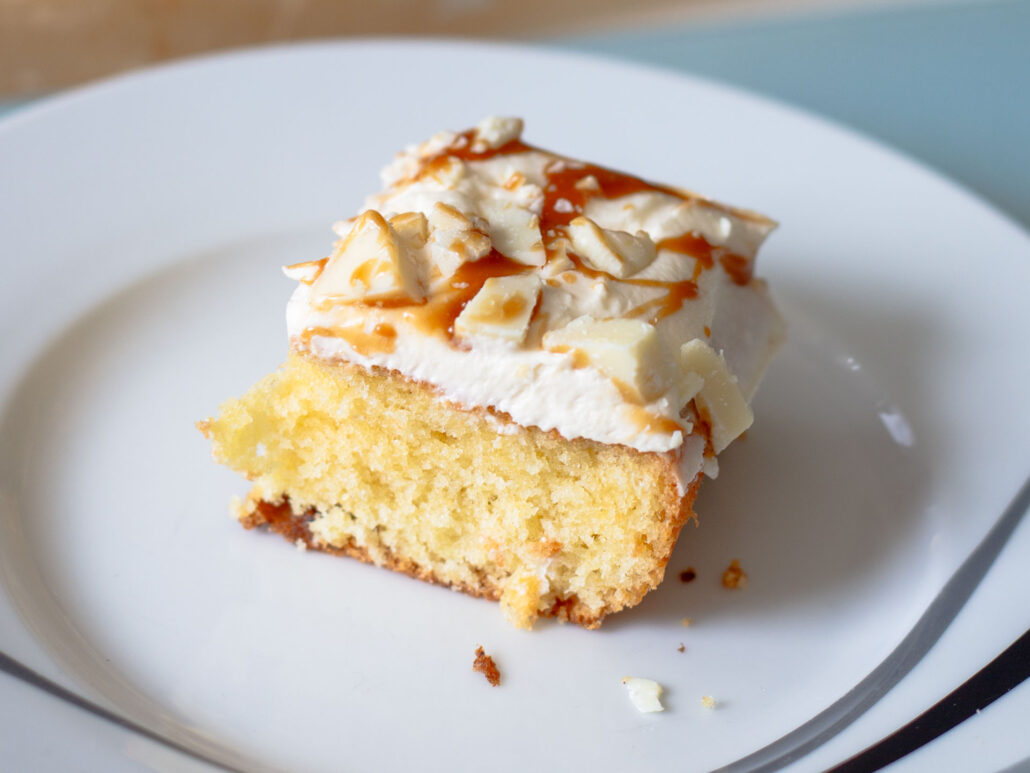
Familiar, soft, and instantly cosy. It starts with a vanilla sponge that’s light as a duvet, the kind that springs back when you press it, then melts into buttery crumbs the second it hits your tongue.
Then comes the magic.
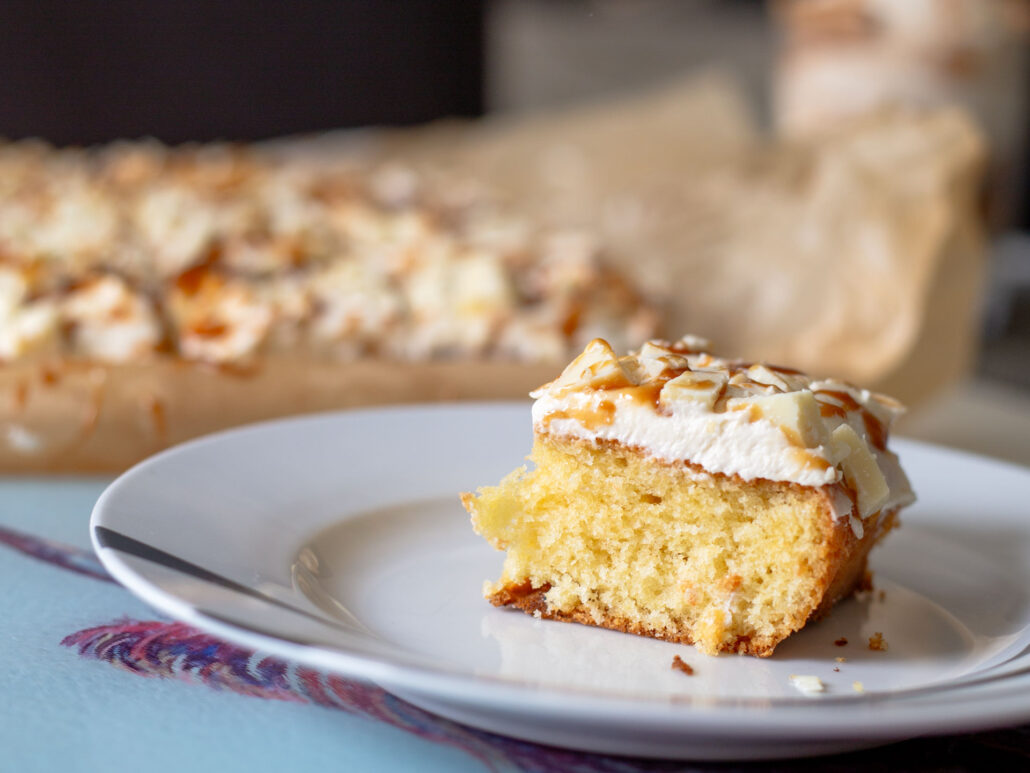
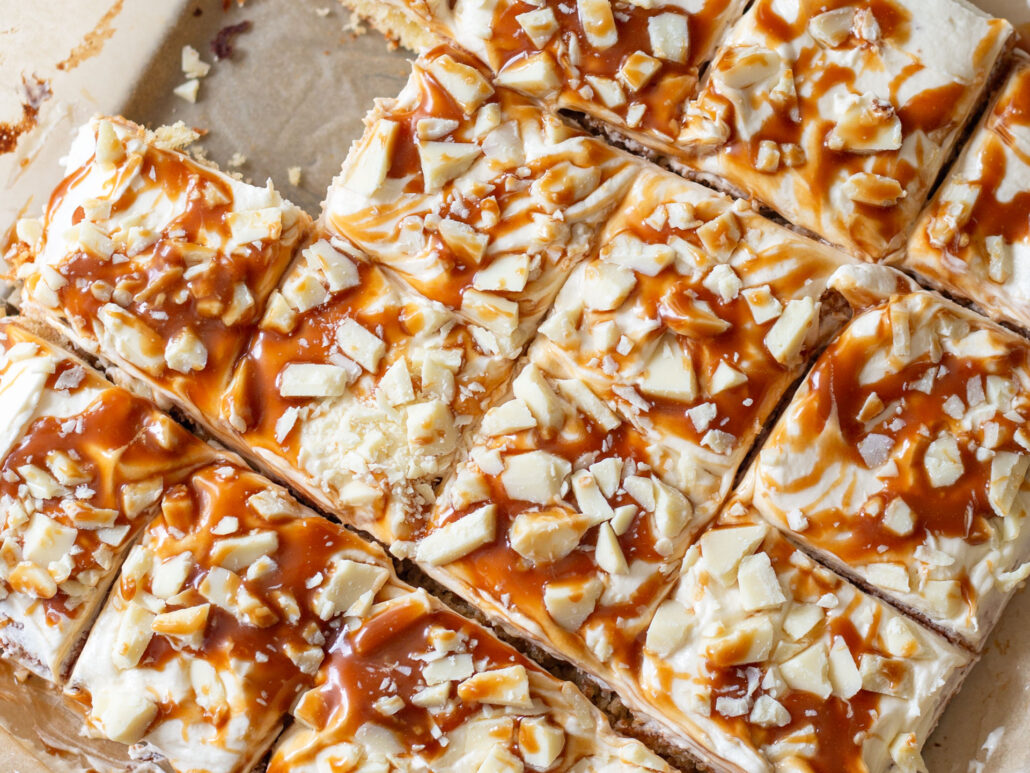
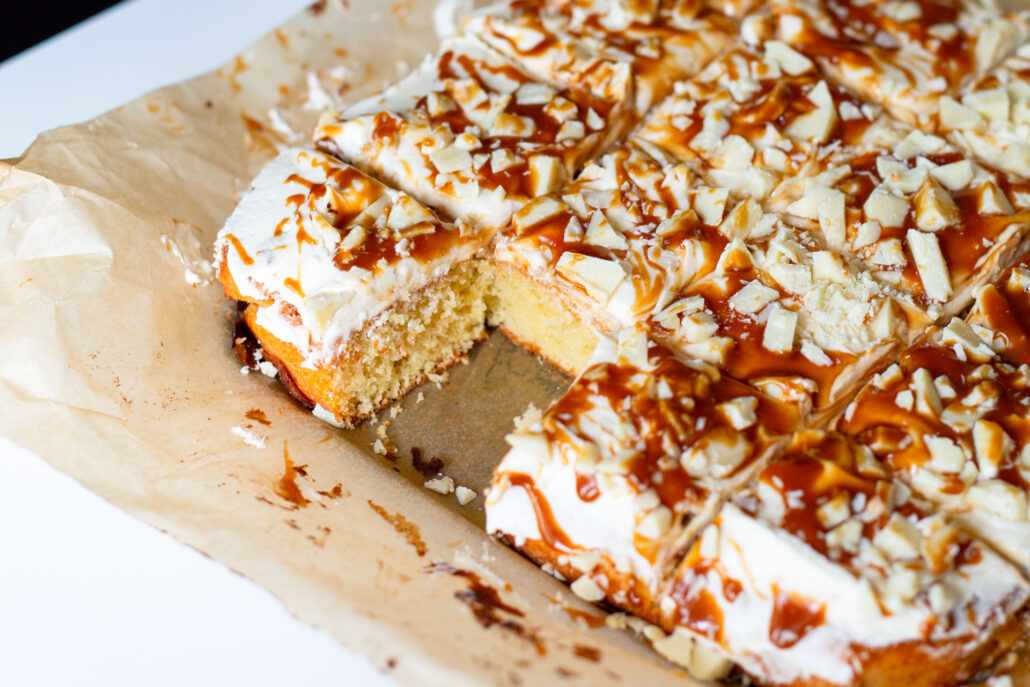
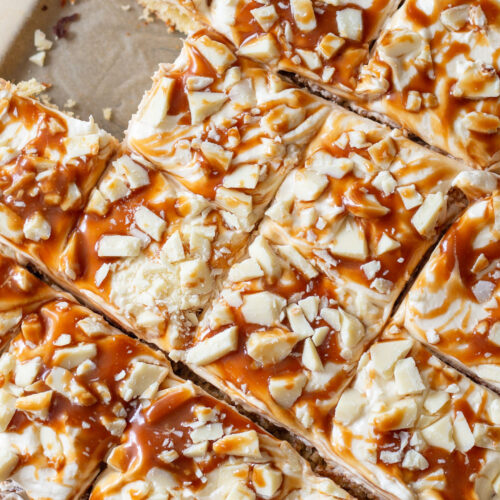
A thick swipe of creamy butter icing, a glossy drizzle of Biscoff, and a snowfall of roughly chopped Milkybar white chocolate scattered over the top. It is not neat and perfect. It is purposely rustic, like the best kind of old school traybake, but dressed up for the occasion.
It is the kind of sponge cake recipe you bake when you want the house to smell like comfort. Perfect for family Sundays with a big mug of tea and special occasions too, when you want something that looks generous and tastes even better.
And if you think you’ve had this flavour combo before, wait till you see what makes this one different.
What Makes This Sponge Cake Recipe Different
There are loads of Biscoff cakes out there, but this one is built around the sponge first. It’s the kind of cake you can actually slice properly, pop on a plate, and eat with a brew.
It tastes like a wee throwback, just with a bit more personality.
The texture of a classic school sponge cake
It’s got that classic school sponge feel, soft and properly fluffy with a fine, even crumb that slices clean and stays tender under a thick layer of icing.
It stays tender for days too, which is exactly what you want under a generous layer of icing. This sponge cake recipe is simple, but it delivers that real nostalgic cake texture.
Why Biscoff works so well with vanilla sponge
Vanilla sponge is sweet and mellow. It lets other flavours come through without turning the whole thing into sugar overload. Biscoff brings the deeper notes.
Caramel, toasted biscuit, a little warmth from the spice. Put them together and it tastes like a biscuit with your tea, only in cake form.
Next up, let’s get into the ingredients for this sponge cake recipe.
Ingredients for This Sponge Cake Recipe
Every ingredient here earns its spot. Nothing fancy, nothing random. Just a handful of basics working together to make a sponge that’s soft, comforting, and properly nostalgic.
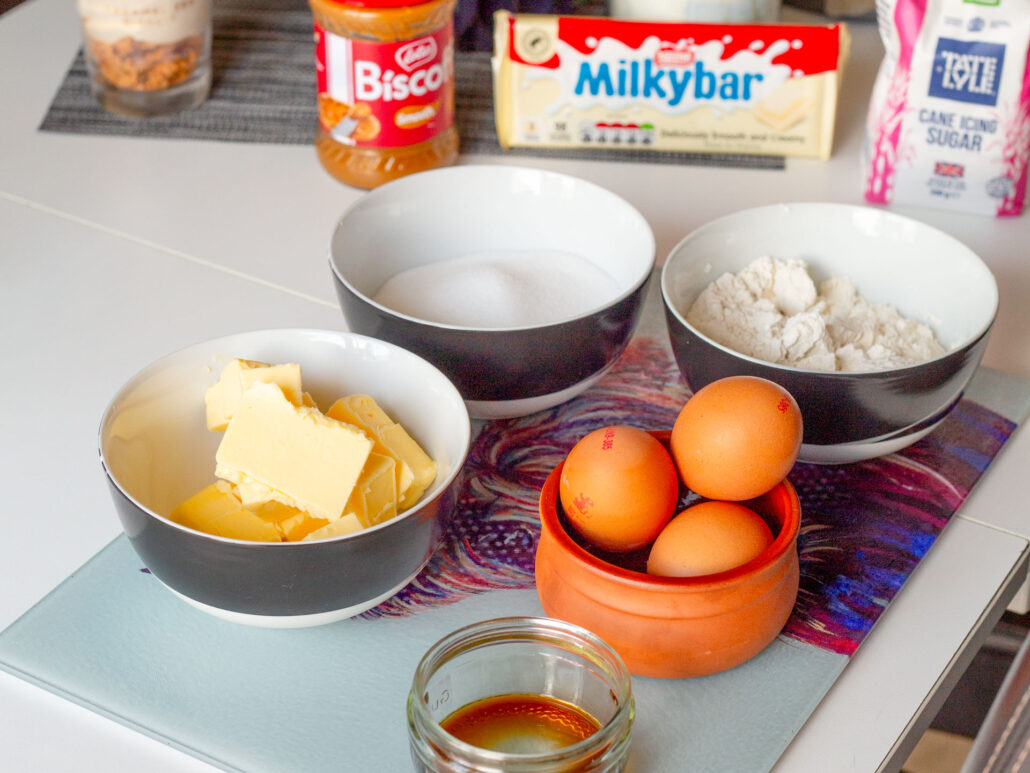
Sponge cake ingredients
Butter: This is where the richness lives. It melts through the batter like warmth spreading through a room, giving you that tender, buttery crumb.
Caster sugar: Sweetness, yes, but it also builds the texture. It whips into the butter to make the sponge feel lighter, like it’s been fluffed up from the inside.
Eggs: They bring structure and lift. They hold everything together and help the sponge rise in the oven with that gentle, steady puff.
Self-raising flour: The backbone. It gives the cake its shape and that familiar soft bounce when you press the top.
Topping
Icing sugar: Turns into that classic, smooth icing layer. Sweet and soft, like a thin blanket over the sponge.
Butter: The richness in the icing. It transforms sugar into something smooth, creamy, and spreadable, like velvet on a warm sponge.
Milk: A small thing that makes a big difference. It loosens the icing into something silky and spreadable.
Biscoff spread: Caramel and spice in spoon form. It adds that deep, toasted warmth that makes the whole cake taste extra cosy.
White chocolate: Chopped roughly and scattered on top, it gives creamy sweetness and little bites of texture without taking over.
Together, it all builds towards the perfect vanilla sponge topped with butter icing, Biscoff, and a white chocolate finish that defines this sponge cake recipe.
Step by Step Sponge Cake Recipe Method
This sponge cake recipe is slow comfort baking. Nothing rushed, just simple steps building into something soft, nostalgic and deeply satisfying.
Making the fluffy vanilla sponge
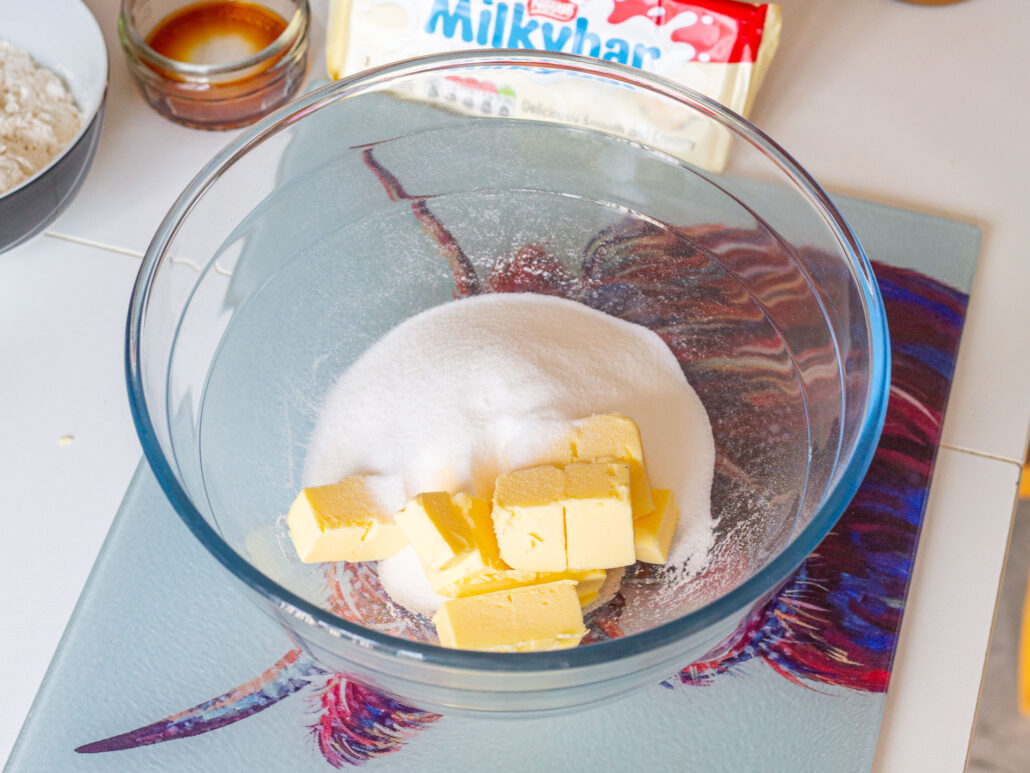
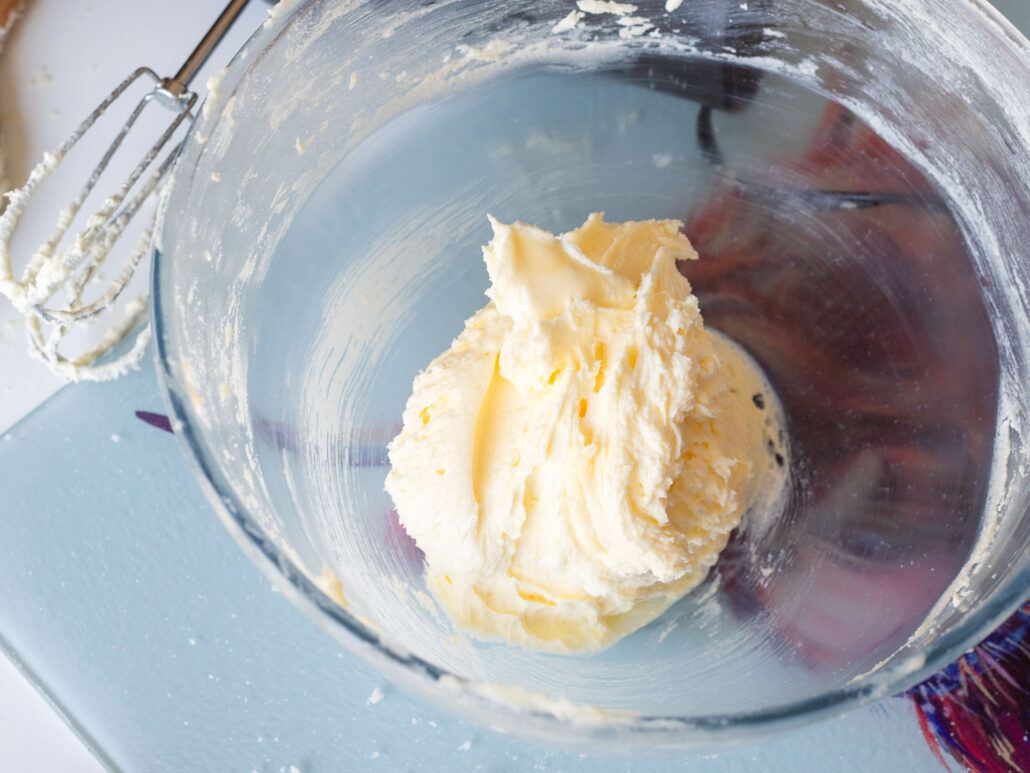
Start by creaming the butter, sugar and vanilla together until pale, light and fluffy. It should look almost whipped, like soft clouds holding their shape. The vanilla should smell warm and familiar at this point, like cake batter you remember from childhood.
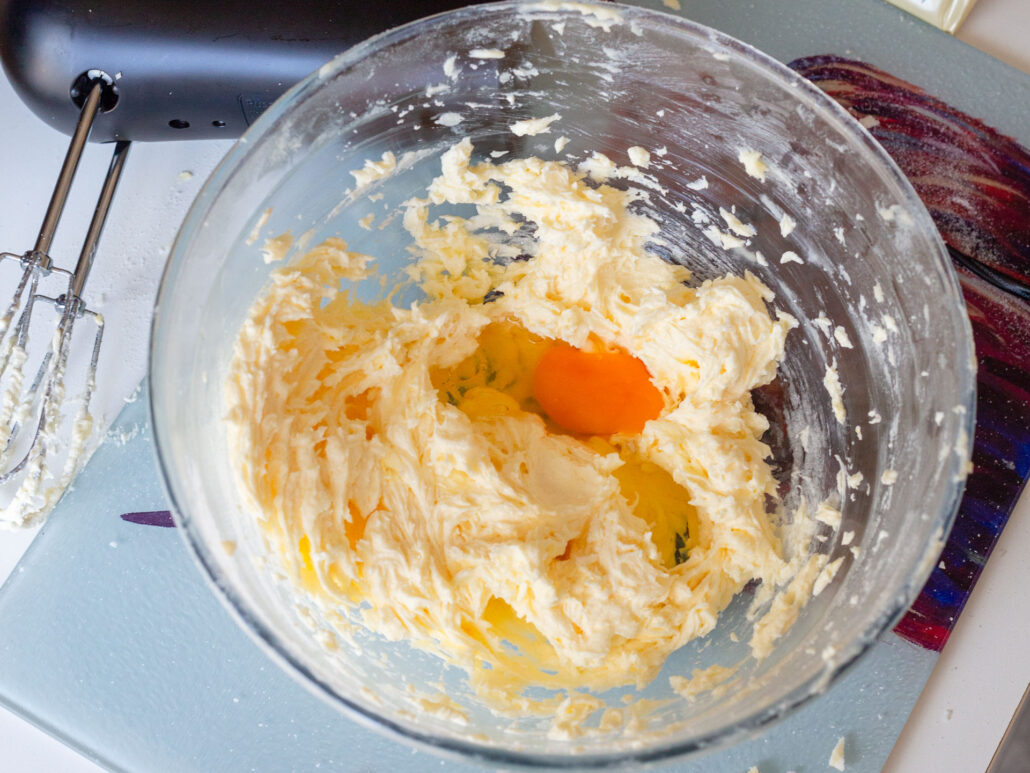
Beat in the eggs one at a time, letting each one fully disappear before adding the next. The mixture should turn glossy and smooth, like thick custard just before it sets.
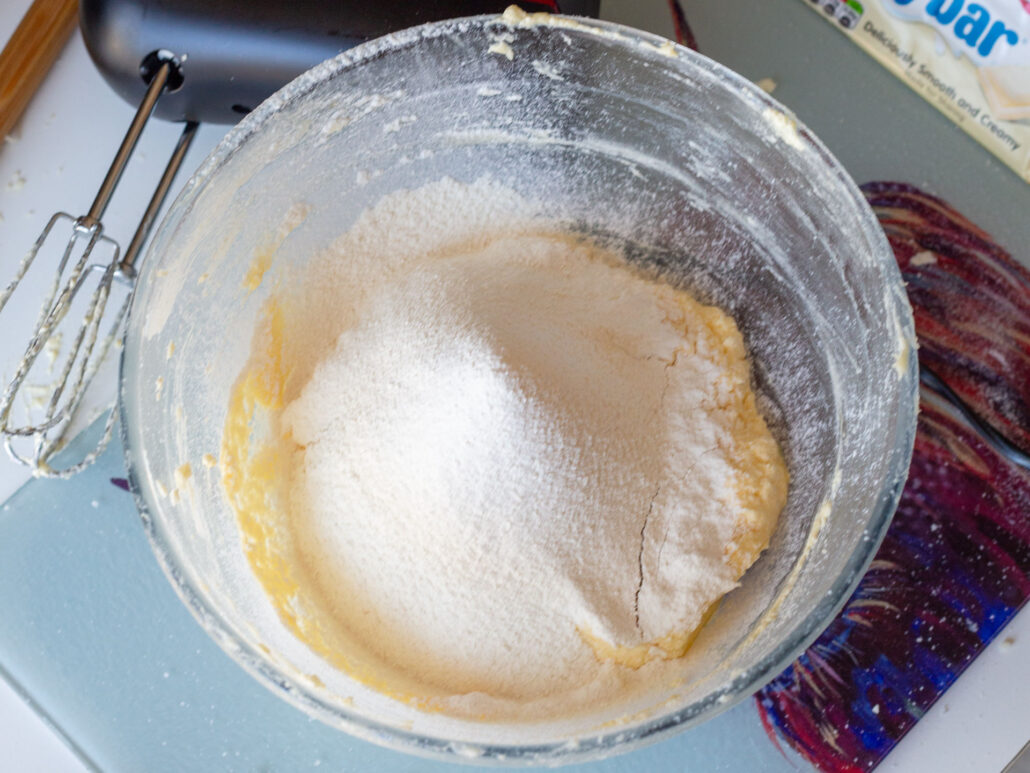
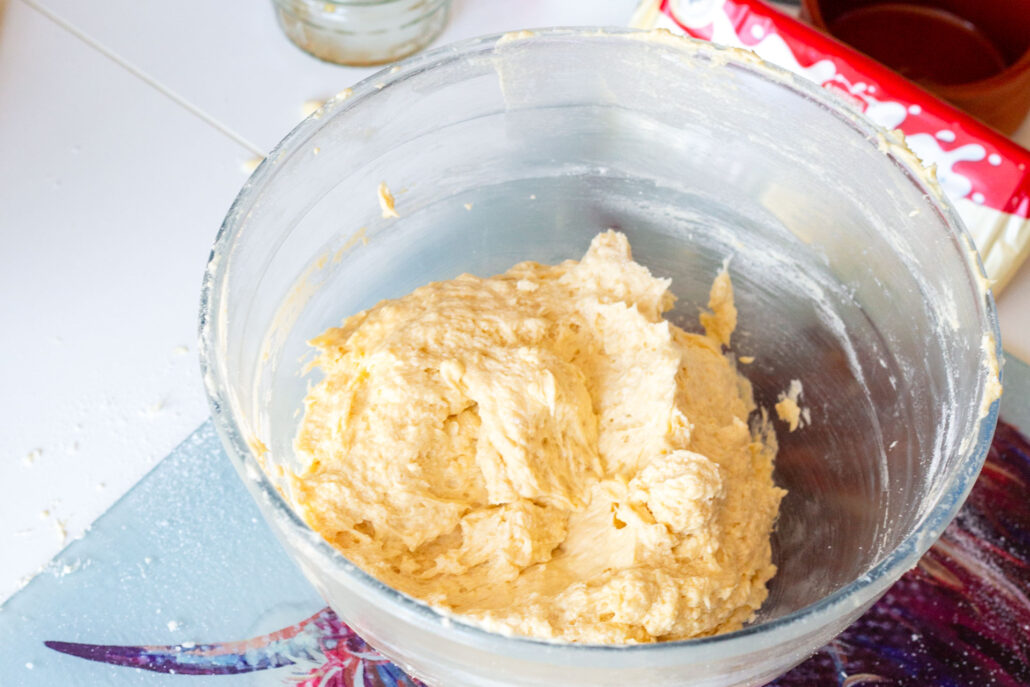
Gently fold in the self-raising flour, keeping it light and careful so you do not knock out the air you have just built in.
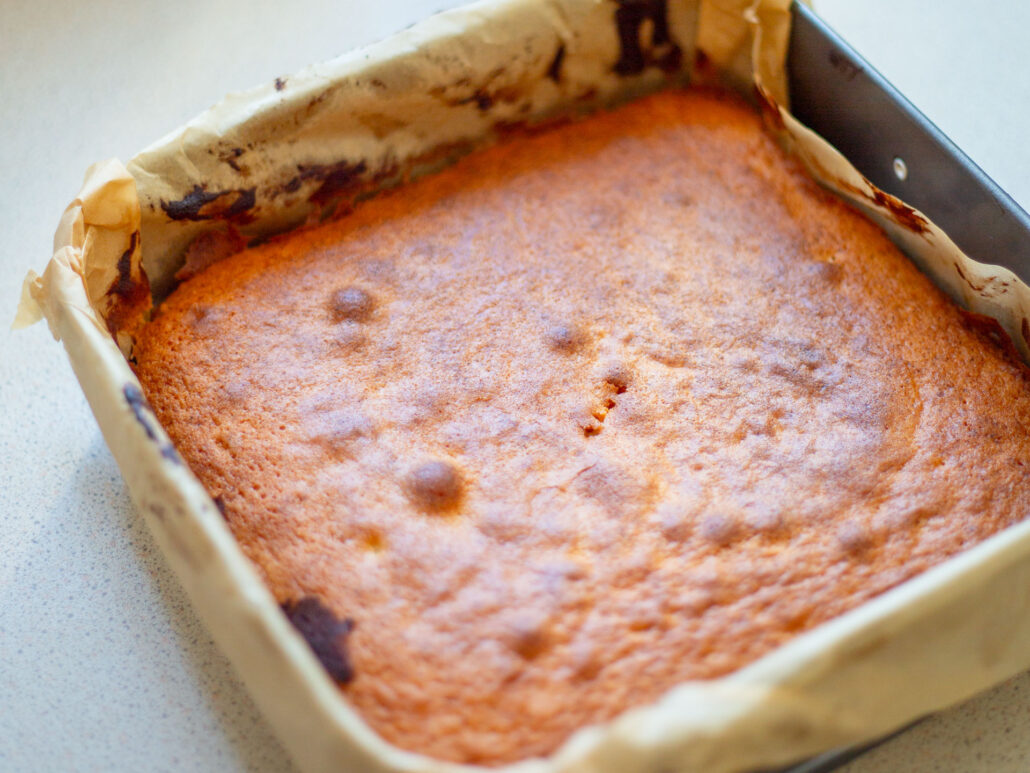
Spoon into a lined tin and bake until golden, risen and springy to the touch.
Cooling and preparing the icing layer
Let the sponge cool completely before icing. Warm cake will melt everything and ruin that clean, soft finish.
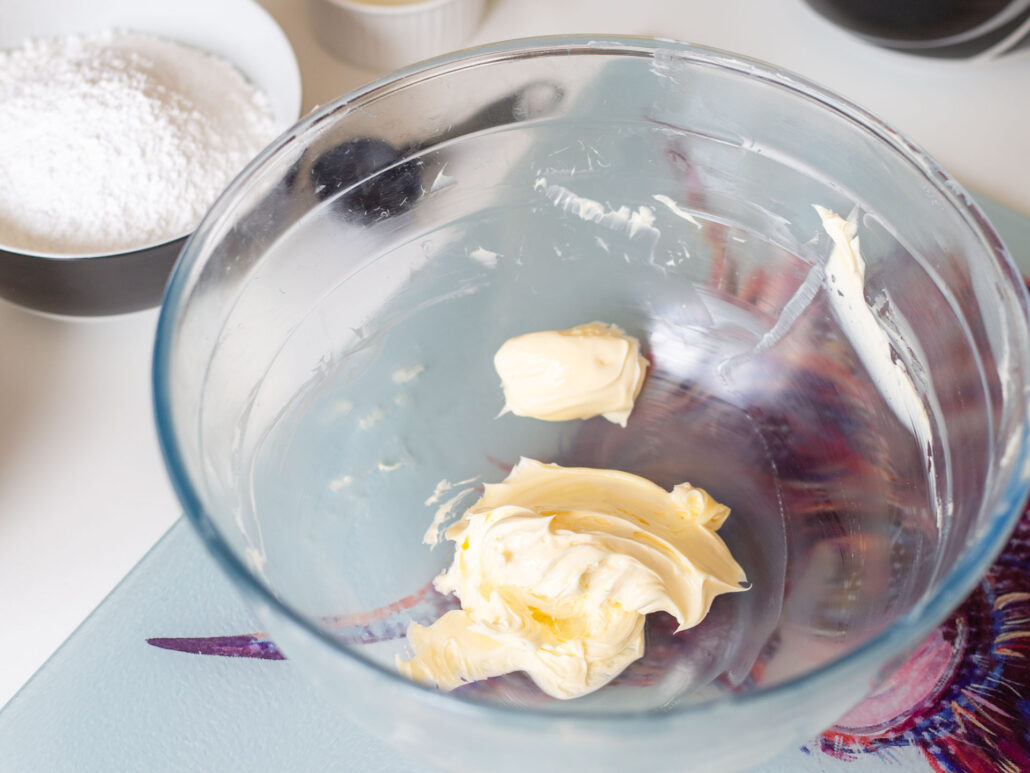
To make the butter icing, beat the butter on its own for about 5 minutes. It should turn pale, fluffy and almost whipped in texture. This step is what creates that soft, melt-in-the-mouth feel.
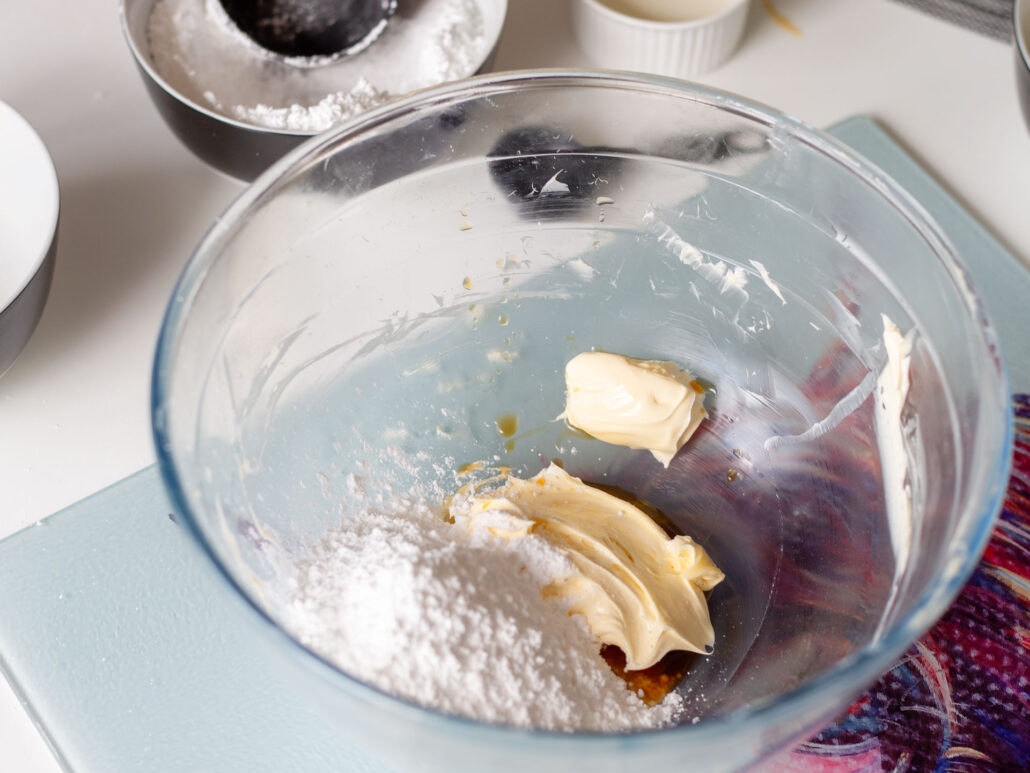
Add the icing sugar, vanilla and milk, then beat again until silky and spreadable. It should feel like smooth frosting you could eat by the spoonful.
Adding icing, Biscoff drizzle and white chocolate finish
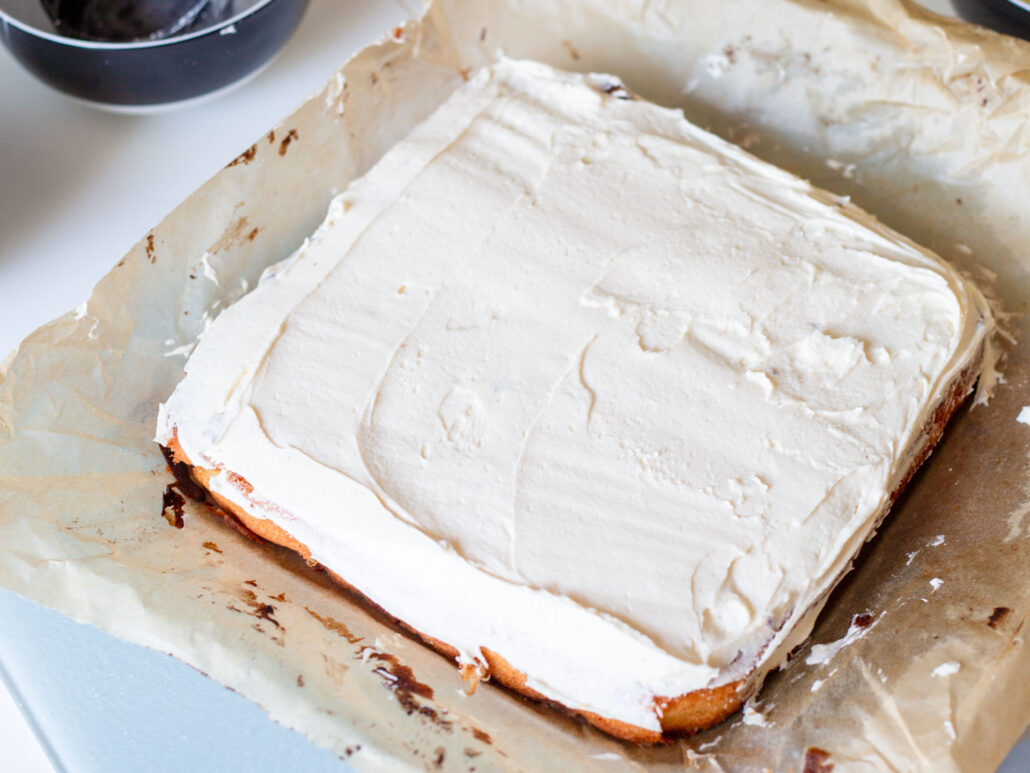
Turn the sponge upside down to get that super flat area for our icing.
Spread the butter icing generously over the cooled sponge, letting it sit thick and even like a soft blanket over warm skin.
Warm the Biscoff slightly so it drizzles easily, then let it fall in slow caramel ribbons across the icing.
Finish with white chocolate, either melted and drizzled or roughly chopped and scattered like sweet snow.
This is where the sponge cake recipe becomes something you do not forget.
Tips for the Perfect Sponge Cake Recipe
A good sponge cake recipe is less about precision and more about feel. Knowing when to mix, when to stop, and when to trust the process is what turns simple ingredients into something soft, nostalgic and comforting.
How to keep your sponge light and airy
The magic starts with creaming. Beat the butter, sugar and vanilla until pale and fluffy, almost like whipped cream, holding soft peaks. This is where you trap air, and that air is what gives your sponge its lift.
Add the eggs one at a time, letting each one fully disappear before adding the next, so the mixture stays smooth and stable.
When you add the flour, fold it in gently. Slow sweeping motions like tucking a blanket around something delicate keep the air intact.
How do you know when to stop mixing and if you have over mixed?
Stop mixing the moment you can no longer see streaks of flour. That is your cue.
If you overmix, the batter changes. It becomes thick, tight and slightly rubbery instead of light and airy. A good batter should drop from the spoon in soft ribbons, not stretch or feel elastic. That elasticity is gluten overworking itself, and it leads to a heavier sponge.
Preventing a dry sponge
Dry sponge usually comes from overbaking or losing moisture too early. Keep an eye on your oven and test a few minutes before the timer ends.
A key question is whether you should open the oven door.
Yes, but timing matters.
Avoid opening the door for the first 20 minutes of baking. Before this point, the structure is still setting and a sudden drop in temperature can cause sinking.
After 20 minutes, it is safe to briefly open the door if needed, for example, to turn the tin for an even bake. Turning it helps prevent one side from rising higher than the other, especially in ovens with hot spots.
After that point, quick checks are fine. Just avoid repeated opening, as each time you let heat escape, you risk a slightly drier sponge.
Get these details right and this sponge cake recipe stays soft, nostalgic and comforting for days, not just the first slice.
Serving Ideas for This Sponge Cake Recipe
This sponge cake recipe really shines in those slow, together moments where no one is in a rush and the kettle is always within reach.
I made it for a Father’s Day afternoon cuppa.
The kind where the table fills up with mugs, the chat comes in waves, and someone is always “just having a small slice” that somehow turns into a proper wedge. It suits that big family gathering energy, where the cake sits in the middle and quietly disappears, one forkful at a time.
With its soft vanilla sponge, sweet butter icing, Biscoff drizzle and that white chocolate finish, it feels like a proper treat.
Comforting, but still a little special. No extras needed. Just a hot drink and people who are happy to linger.
It’s also brilliant after a Sunday roast with custard poured generously over the top. The warmth melts into the icing and sponge, turning each bite into something soft, creamy, and deeply nostalgic.
The kind of pudding that slows everyone down, even when they swear they’re too full.

Storage for This Sponge Cake Recipe
A good sponge cake recipe does not stop when it comes out the oven. Storage is what keeps it soft and nostalgic, or lets it slowly dry out and lose that comforting texture.
How to keep it soft for days
Let the sponge cool completely first. Then store it in an airtight container. That seal is everything. It locks in moisture and keeps the crumb soft. Keep it at room temperature if you are eating it within 2 to 3 days.
If it is already iced and topped with butter icing, Biscoff and white chocolate, store it somewhere cool out of direct heat and sunlight. Try to avoid the fridge if you can. Fridge air tends to dry out the sponge and can make it feel firmer than you want.
Can you freeze sponge cake?
Yes.
This sponge cake recipe freezes really well. For best results, freeze the plain sponge before adding icing and toppings. Wrap it tightly in cling film, then a layer of foil, so no air can get in. It will keep well for up to 3 months.
If it is already iced, you can still freeze it, but the topping may soften slightly once it thaws.
How to thaw for best results
Defrost the sponge at room temperature and keep it wrapped while it thaws. This stops condensation from settling into the cake and making it soggy. Once fully thawed, unwrap it and let it sit for a bit before serving, so the texture softens back up and the flavours come through.
Done right, it still tastes like it was just baked. Soft, comforting, and very easy to go back for another slice.
Are you more cake, brownies, blondies or cookies?
Biscoff & White Chocolate Sponge Cake
Ingredients
Sponge cake
- 175 g butter
- 175 g caster sugar
- 3 eggs
- 175 g self-raising flour
Topping
- 80 g icing sugar
- 2 tbsp milk 2-3 tbsp to loosen butter icing
- 40 g biscoff spread
- 90 g white chocolate
Instructions
- Preheat the oven to 170 degrees C
- Start by creaming the butter and caster sugar, this takes a while and it should be pale and all the sugar should have dissolved (min 5 minutes).
- Add your eggs, vanilla extract and mix until combined.
- Now add the self-raising and fold in just till you can’t see any dry flour.
- Put in the oven for 30 mins. Put a fork in the middle and it should come out clean. Let the cake cool fully before icing.
- For the icing beat the butter until it’s pale, it should look smooth and white.
- Add the icing sugar in gradually, split into three additions. If it starts to get to thick add a tablespoon of milk to keep it spreadable.
- Now spread all the icing over the cake
- Melt the biscoff spread in the microwave, 10s bursts, be careful to to burn.
- Drizzle the biscoff spread over the icing sugar.
- Chop your white chocolate roughly and then sprinkle it over the top of the icing sugar.
- Serve and enjoy